Note: This article assumes you are using a classic template. For Layouts-enabled blogs, you can simply add a new AdSense page element to your sidebar, or drag an existing element to the desired location.
If you're new to AdSense and not too familiar with making modifications to your blog's template, you can follow these instructions for placing AdSense code in your blog's sidebar (using the Minima template as an example).
Assuming you have already
signed up and been approved for a Google AdSense account, you should be able to
log in here. Once you're signed in, click the
AdSense Settings tab near the top of the page. To cut right to the chase, focus on these steps:
- Choose Your Ad Layout - To fit ads in your sidebar, it's best to choose one of the following ad layouts.
Button (125x125)
Skyscraper (120x600)
Wide Skyscraper (160 x 600)
Vertical Banner (120 x 240)
Small Rectangle (180x150)
- Choose a color palette - They are very cleverly named but it's really just a matter of your preference.
- Copy your AdSense code - At the bottom of the page, there's a box with code in it. Highlight all of that code and copy it.
- Paste the code somewhere - Notepad or Text Edit or something like that is a good place for now.
- Go to Blogger.com and sign in - Choose the blog you want to put ads on and click the template tab.
- This is less of a step and more of a precaution - Copy your entire Blogger template and save it in Notepad or Text Edit just in case.
- Find the place in your template that says this; you might have to scroll down pretty far:
<!-- Begin #sidebar -->
<div id="sidebar"><div id="sidebar2">
- Paste the AdSense code you saved earlier right after that part.
<!-- Begin #sidebar -->
<div id="sidebar"><div id="sidebar2">
PUT YOUR ADSENSE CODE HERE!
- Save your template changes and republish your blog.
How to put Google Affiliate Network links in your blog's sidebar
If you're new to Google Affiliate Network and not too familiar with making modifications to your blog's template, you can follow these instructions for placing Google Affiliate Network links in your blog's sidebar (using the Minima template as an example).
Once you
sign up and are approved for a Google Affiliate Network account, you can
sign in here to view your account. Once you're signed in, click the
Links tab near the top of the page. Select which advertiser's links you want to work with, and then follow these steps:
- Choose your links - In the 'Links' section of your profile, select the advertiser whose links you want to use. Click Get Links in the Action drop down menu next to the advertiser's name. Click either the Text Links or the Image Links tab to view your options in each category. To fit ads in your sidebar, it's best to choose one of the following dimensions for an image link:
Button (125x125)
Skyscraper (120x600)
Wide Skyscraper (160 x 600)
Vertical Banner (120 x 240)
Small Rectangle (180x150)
- Copy your Affiliate link HTML - Just beneath your desired link, click Get HTML. A box with code in it will appear. Highlight all of that code, then copy and paste it into Notepad, Text Edit, or a similar program.
- Sign in to Blogger - Choose the blog you want to put ads on and click the Template tab.
- Caution - Copy your entire Blogger template and save it in Notepad or Text Edit just in case.
- Find the place in your template that says:
<!-- Begin #sidebar -->
<div id="sidebar"><div id="sidebar2">
- Paste the Affiliate link HTML you saved earlier right beneath that place in the template:
<!-- Begin #sidebar -->
<div id="sidebar"><div id="sidebar2">
PUT YOUR AFFILIATE LINK HTML HERE!
- Save your template changes and republish your blog.

 9:34 AM
 Roy
Roy
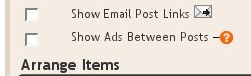 Once you check this box you'll see the configuration options for your ads. You can then select how often you would like ads to be shown after your posts.
 For example, if you want ads to be displayed after every post, select "1" from the drop-down menu. (Please note that AdSense policies limits you to a total of 3 ad units per page and Blogger will automatically prevent you from going over this limit.) You can then select your ad format and colors. Once you have finished configuring your ads, click on the orange "Save Changes" button in the bottom right corner.
 Posted in
 Our default templates are already set up with the necessary code for backlinks. However, if you have a custom template, or one of our templates from before this feature was launched, you will need to add the code yourself.
  If you click that link you'll be taken to the post page, where the backlinks are all listed beneath the comments. Clicking the triangles next to each link will display a snippet of text from the page linking to you, as well as some author and date information.
 If you want to turn off backlinks for individual posts, you can do so. The process is the same as that for turning off comments. Just edit the post in question and change the options that appear below the posting form:
 Notes:
